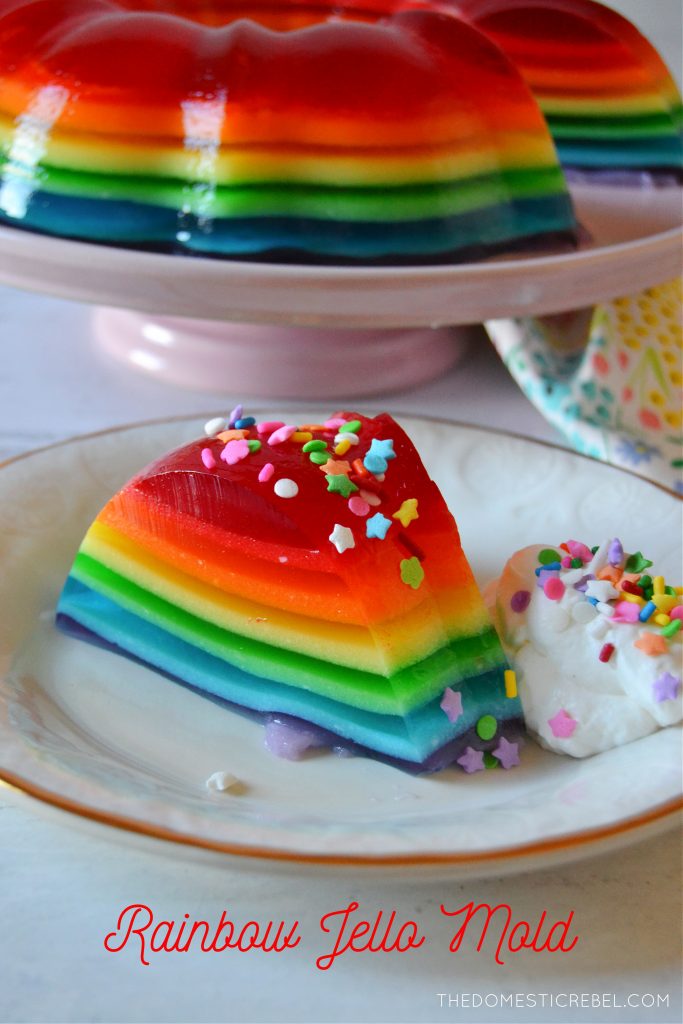
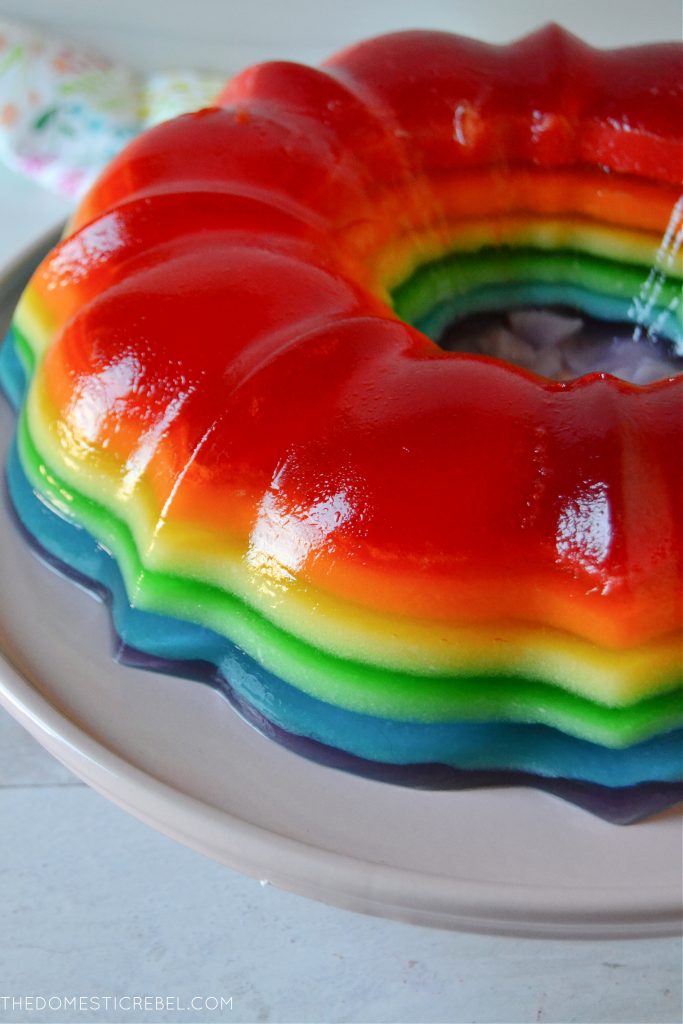
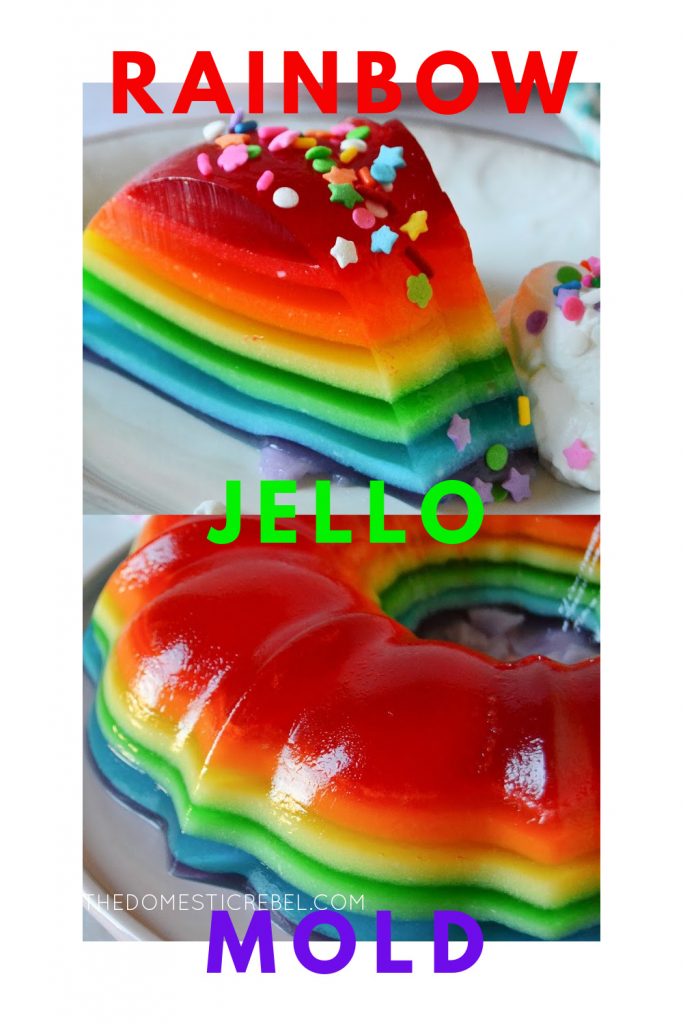
This Rainbow Jello Mold is seriously delicious and a total show-stopping dessert! Six layers of vibrant, fruity goodness in every bite!
I cannot believe I am saying this, but The Domestic Rebel is officially 10 years old!
HOWWWWW.
While I wrack my brain as to how I have a decade-old child, I am also confused as to how I am turning 30 on Sunday, January 24? It’s a double whammy and I am so excited, proud, grateful, and humbled.. and did I mention GRATEFUL? I mean, sheesh. How many people can say they made their own career at 20? I feel exceptionally lucky. It isn’t without lots of hard work, money, sweat and tears, though.
However, I wouldn’t change a thing! From this website I have been on national TV, I’ve sold my books on QVC, I have written 3 cookbooks, one of which was a best-seller!, and I have traveled the world. It’s been super cool and I absolutely feel so grateful and humbled that everyone enjoys this website and my recipes that I concoct in my very own apartment kitchen.
So, Happy Blog Birthday to The Domestic Rebel! And Happy Birthday to me on Sunday! With that said, let’s talk about this magical Rainbow Jello Mold!
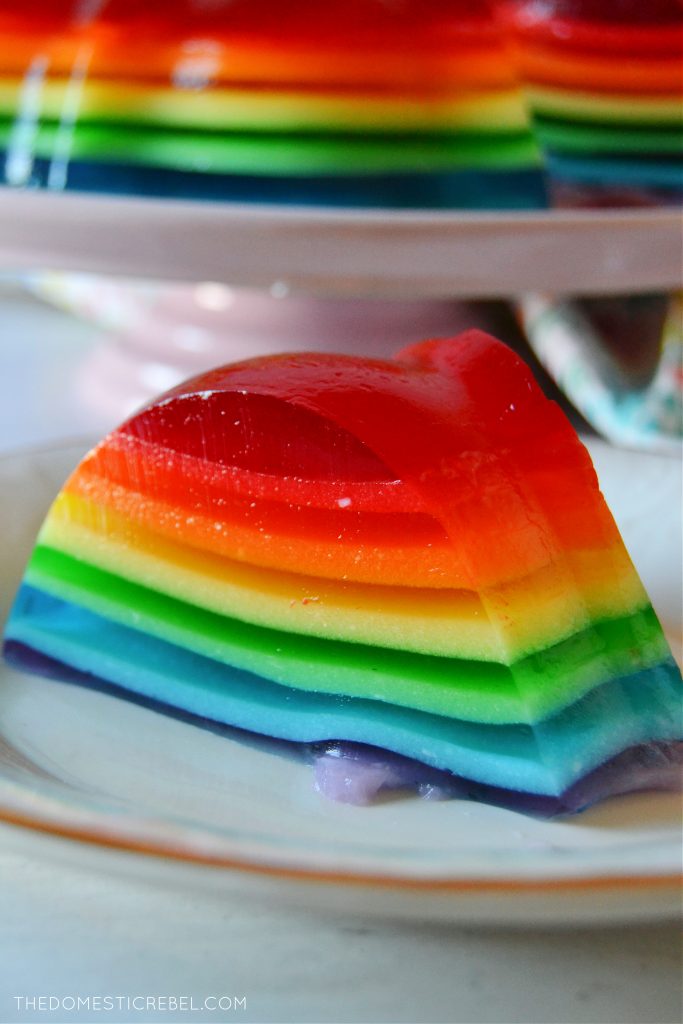
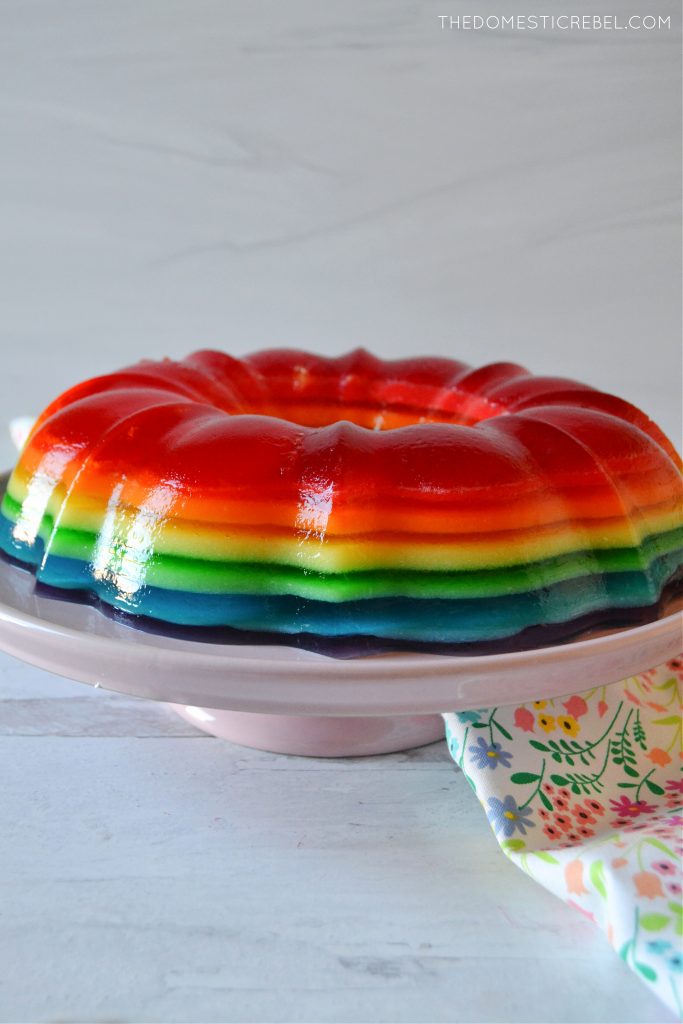 Now, I’m not going to lie to you: this recipe is very time-consuming. It takes about 3-ish hours to make (though a lot of that is down time) and then it has to chill for a few hours, so it takes awhile. Plan in advance! But you will be rewarded with a seriously stunning ring of fruity, fabulous Jello.
Tips for a Successful Jello Mold
- Make sure you grease your 10-cup Bundt pan with cooking spray. This prevents the Jello mold from sticking. Make sure you grease the middle part, too – I notice people often forget that and their cakes stick to the middle portion of the pan.
- For best results, make all of the Jello at once and leave any future Jello layers out at room temperature. In my experience, even hours after you made the Jello, the Jello shouldn’t set in its glass/cup/bowl. If it does, simply dip the bottom of the glass in some warm water for a few seconds (taking care not to get water inside with the Jello) and stir to loosen it up.
- How to tell when to move on to the next layer? This is crucial! You want the Jello to be soft-set and firmed but not completely solid. My experience is to quickly tap your finger on the surface of the Jello in the pan. If your finger comes away with some Jello on it (not liquid Jello) and there’s a faint impression in the Jello in the pan, it’s ready. It should not be sloshy liquid in the pan but it won’t be completely set, either. If you wait too long between layers, you run the risk of the next layer not adhering well to the existing layers. Working consistently every 15 minutes prevents this from happening!
- We need to be gentle and work slowly when layering the Jello colors in the mold. For this, I like to take a large soup spoon and spoon slowly and gently onto the previous layer. Spoon towards the middle of the ring and the Jello will naturally flow to fill that layer. Do not pour or splash the Jello into the mold as it may disturb the previous layer.
- The first few intervals will take the longest since the Jello is the warmest it’ll be and because it is the base for the remaining layers. However, once you start making a few layers, the process will be faster.
- You can use any flavors of Jello you’d like! Just use 3-oz boxes which are about 4-serving size’s worth. If you can only find the larger boxes, you can just take a heaping 1/3 cup of the Jello powder and use that. Discard or use the remaining powder for another use.
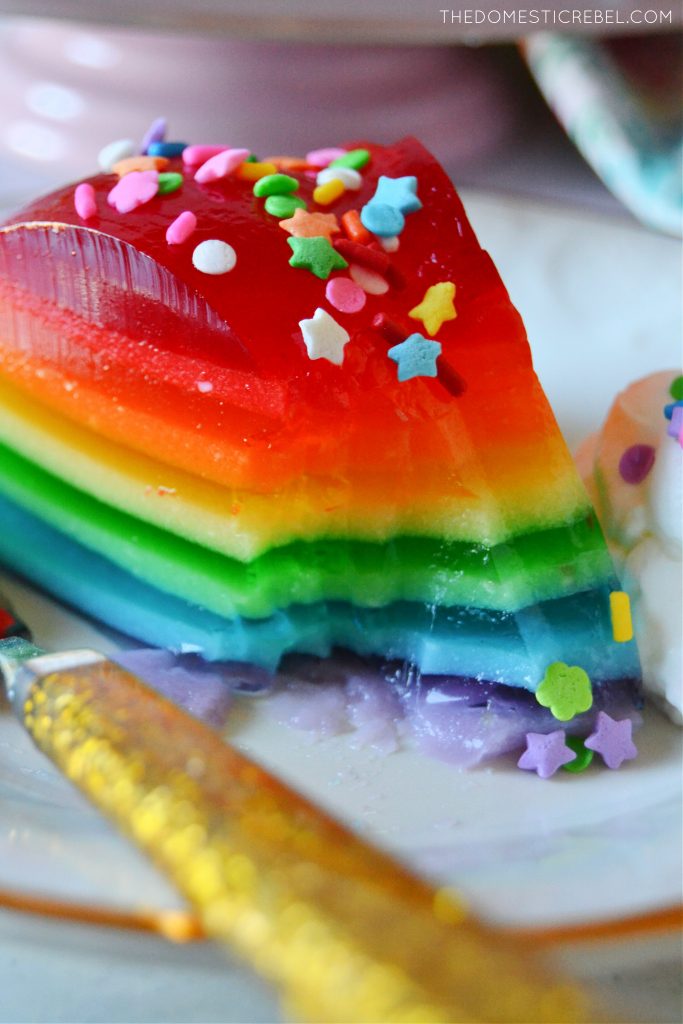
 Since those of you who follow me on Instagram know I do those funny vintage cookbook tours, I have been asked repeatedly to do a vintage recipe and this is it! Although this one is definitely more appealing than the ones I usually share 🙂 It’s retro, fun, fruity and so delicious!
Rainbow Jello Mold – the perfect kick off to years 10 and 30!
Rainbow Jello Mold
Ingredients
- 7½ cups boiling hot water divided
- 6 (3 oz each) boxes cherry, orange, lemon, lime, berry blue and grape Jello if you cannot find the 3oz (4 serving size) boxes, you can use 1/3 cup of the Jello powder from a larger box
- 1 cup low-fat vanilla yogurt
Instructions
- Grease a 10-cup Bundt or tube pan with cooking spray; set aside. Meanwhile, place each flavor of Jello powder into 6 separate heat-proof bowls, glasses or cups. Pour 1¼ cups of boiling water into each Jello cup, stirring to dissolve the Jello powder for about 1 minute each cup. You should now have 6 cups filled with hot Jello liquid, one of each flavor. Let set at room temperature for 30 minutes.
- Starting with cherry (red), pour 3/4 cup of the cherry Jello liquid into the bottom of the greased pan. Refrigerate for 15-20 minutes. Meanwhile, stir in 1½ Tablespoons of the vanilla yogurt into the remaining cherry Jello, stirring vigorously until no lumps of yogurt remain. Refrigerate the yogurt mixture while the Jello sets in the mold. The key to knowing when it is done is when you tap the surface of the Jello quickly, your finger should leave a small impression in the Jello and your finger should have some Jello on it (but not be dripping with liquid). It needs to be soft set but not completely firm. This balance is key because if it is too soft it will meld together, but if it is too firm, the other layer won't stick properly.
- Once the cherry Jello in the mold is soft-set and ready, take a soup spoon and gently spoon the whisked cherry yogurt mixture onto the surface of the Jello in the mold, pouring slowly and toward the center. I recommend pouring toward the center so if there are breaks in the layer below, it won't be as noticeable. Refrigerate the mold for 15 minutes.
- Repeat with remaining layers; after 15 minutes, add in your ¾ cup orange Jello layer, then refrigerate 15 minutes. Whisk in the 1½ Tbsp yogurt into the remaining Orange liquid and then carefully and gently spoon the yogurt mixture onto the soft-set orange layer in the mold, etc. It is okay to leave your Jello liquids out while the other layers set. Lastly, you'll end with the purple yogurt mixture.
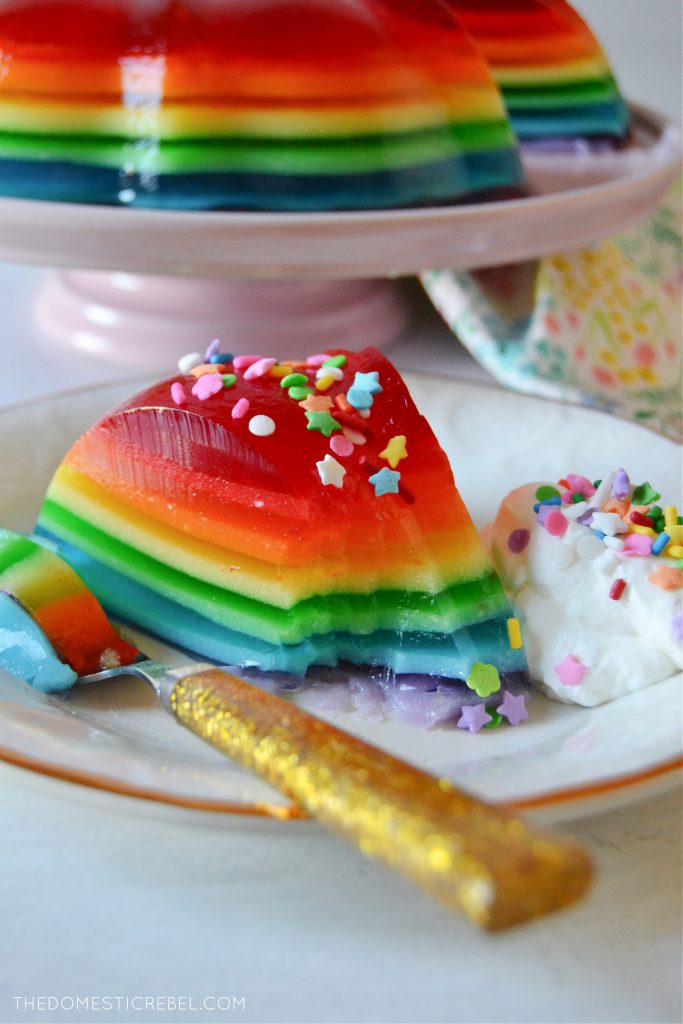
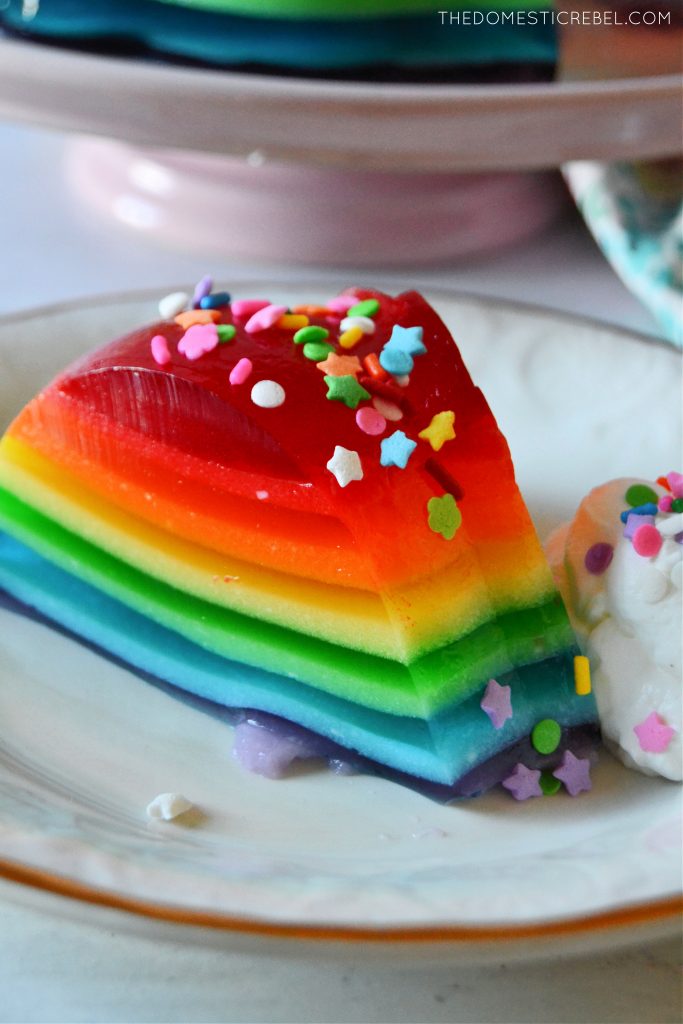
- Refrigerate the entire layered mold for at least 3 hours or overnight, if desired. When ready to serve, lightly moisten a cake stand or platter larger in diameter than the mold and place it upside down onto the mold. Then in one swift motion, invert the mold and cake plate together so the Jello mold comes out in a solid piece onto the cake plate. Serve with whipped cream and sprinkles, if desired.
Notes
 This Rainbow Jello Mold is fantastic and so amazing! You’re going to LOVE it!
Have a super sweet day!
xo, Hayley
Celeb Networth says
Love this recipe! So pretty!
Robb S says
This recipe has a rather big error in it. For the ingredients it calls for 5 boxes of Jello. There are 6 flavors listed and I assume that is correct but if someone else doesn’t catch that then it would screw up the amount of water being added to each by dividing 7.5 by 5 instead of 6. I think it’d be much clearer overall without making everyone do the math though and just say 1.25 cups boiling water for each flavor. Otherwise I love this recipes. It’s attention getting for sure. Thx.
thedomesticrebel says
Hi Robb! Thank you for catching that error! I have fixed the recipe to reflect the proper 6 boxes of gelatin.
Eeeeel says
Omg this was so beautiful.
Emily says
I’ve been making a similar recipe for years! Instead of yogurt though, my great grandma put sour cream to make the creamy layer. It’s seriously so delicious.
Anita says
Hi. Would it still work without the yogurt by using jelly only? Would it still stick together well? Thanks in advance.
thedomesticrebel says
Hi Anita, it should be fine, but you won’t have the cool ombre effect as much.
Lauren Kasnet says
Ok so let me save some people the heartbreak of spending hours making this only to get to the bottom two layers and have them messed up. DO NOT mix all the jello mix and boiling water at the same time as the recipe states. I did this and hours later by the time I got to the blue and purple layers they were solidifying and did not come out perfect like the previous layers. Wait and mix only two or three colors at a time.
Judi says
Can I use sugar free jello
thedomesticrebel says
Hi Judi, yes you can!